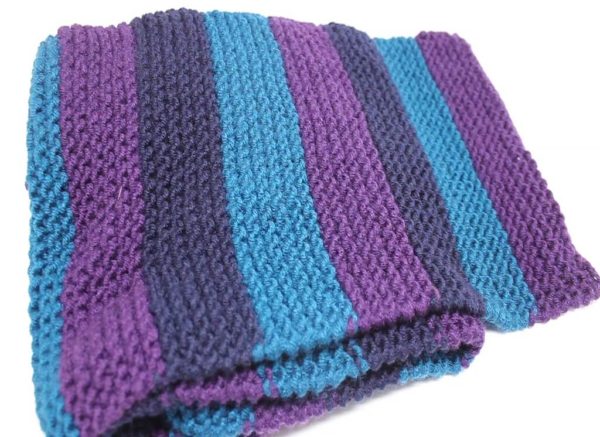
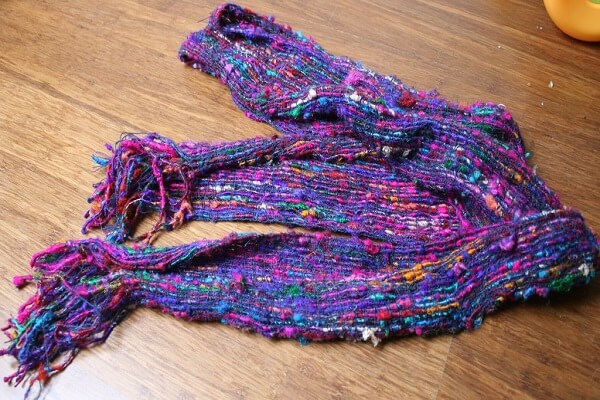
Scarves should be the easiest thing to knit because they are just rows of stitches and blocks of color. We determine how long and thick they are and what colors to use. They may be simple, but we all have to start somewhere.
I started with scarves and remember how nervous I was about knitting scarf patterns. I worried about casting on, changing yarn, and making it all look neat. In this guide, I want to talk about how to knit a scarf in 10 easy steps. Ten may seem like a lot but trust me, many of these knitting steps are small and easy.
Designing A Knitting Scarf
1) Find Your Yarn
See, the first step doesn’t even involve any physical knitting. Planning is essential to any knitting project. You don’t need a complex pattern with a scarf. You do need to be able to create the pattern you want with the right colors.
This means understanding the size of the blocks and complementary color combinations. Anyone that doesn’t want to switch yarn part way can always try variegated yarn for a multicolored effect. Find the colors you want, make sure to buy enough and have it all to hand when settling down to knit.
2) Get Hold Of Some Good Needles That Are Right For The Job
Finding the right yarn is crucial, but so is the need to find the right needles. These tools are your trusted aids throughout the project. You don’t want to be swearing at them every time you drop a stitch. I’ve been there with poor choice and learned my lesson.
Bigger knitting needles create a looser stitch while smaller knitting needles create a tight one. Size 8 to 10 needles are the best option for worsted weight yarn. I advise first-time knitters to go for the larger yarns and needles, so it is easier to make the stitches. You can always go more intricate and tight when you get more confident.
3) Find A Good Place To Sit And Work
I know this sounds like a necessary piece of advice, but it can make a difference. If you get settled in a slightly uncomfortable chair but are in the zone with counting stitches, you may stay put. Avoid the risk of getting backache and missing stitches by setting up in your favorite spot.
That needs to be a place where you are comfortable working for long periods. It also needs to have good lighting and a convenient place to put your yarn and a cup of coffee. Knitting is one of the more relaxed home hobbies when it’s done right.
4) Creating Your First Block Of Color
Once you are confident enough about casting on and creating the stitches, this first element is simple. Cast on to the needle and create a row of stitches. It is up to you how many you have in a row. The number determines the width of the scarf, so figure out how wide you want it to be. Once you make your choice, remember to stay consistent all the way through the block. I advise knitting newcomers to start small and work their way up. Complete 12 rows for a good block of color.
5) Finishing With A Color
Once you have that block completely, you need to cut the yarn in preparation for knitting the next block. Cut it with 6 inches to spare. You will deal with this later. This won’t apply to anyone that is looking to use a single color throughout. However, those that run out and need a new ball of yarn will have to know how to restart. On this note, be sure to buy in bulk with the same batch if planning a single-colored knitting scarf pattern. You don’t want to return to the store to find that the next batch is a touch lighter.
6) Changing Color For The New Block
The next color needs to follow on seamlessly. We do this by aligning the end of the tail we just made with the beginning of the second color of yarn. Keep them in your left hand out of the way of the rest of the thread. This will create a second tail to deal with at the end. You might think that knotting the ends together to form one long thread would be easier. It is easier, but it doesn’t allow for a nice, neat finish.
7) Creating Your Second Block Of Color
With the two ends secure, you just start knitting again until you have five secure stitches. The new row will be in place, and the two tails won’t be going anywhere yet. With the second color of yarn. Knit about five stitches and stop to pull on the ends. Knit 12 more rows with the new yarn to create a block of the same size. If you want a series of the large block and half-sized stripes then only knit six rows.
8) Moving Onto The Third Block Of Color
By this point, the process and the method of creating stitches should be pretty straightforward. There will be points where you lose count or drop a stitch, but it is all part of the learning process. The creation of the rest of the scarf only comes down to following the same method of creating rows and changing colors. It is up to you how long to make the blocks and what colors to add it. This is why this is one of the most popular home hobbies – creativity and simplicity.
9) Knowing When To Stop
This is the one downside of not having a clear plan in place. No pattern means that you can go off on wild ideas and end up knitting a scarf the length of an anaconda. It is fun creating all these colors and shapes, and you can get lost in the rhythm of knitting. However, don’t lose focus on the desired result. It has to look good and be wearable.
10) Finishing The Scarf
Once the scarf is complete, you need to be able to finish it all off nicely by casting off in the correct method and dealing with those loose tails. All you need to do here is use a crochet hook to tuck the loose yarn into the scarf. Once-tidy, you have your first completed knitting scarf pattern to wear with pride.